
image credit: Nykaa
You have the eyeliner and the determination to succeed and get the perfect makeup look which is not cakey but you are a beginner and not well versed at getting the perfect lines. Regardless, you are still on track to achieving the winged liner that you desire. What you should know however is that anyone can wear winged eyeliner regardless of eye shape. It really doesn’t matter what your eye type is, as long as you know how to perfectly execute the drawing and adapt the technique to your specific shape. That’s what this guide is all about, so don’t fret.
As an Amazon Associate, I earn from qualifying purchases. This post contains affiliate links marked (paid link).
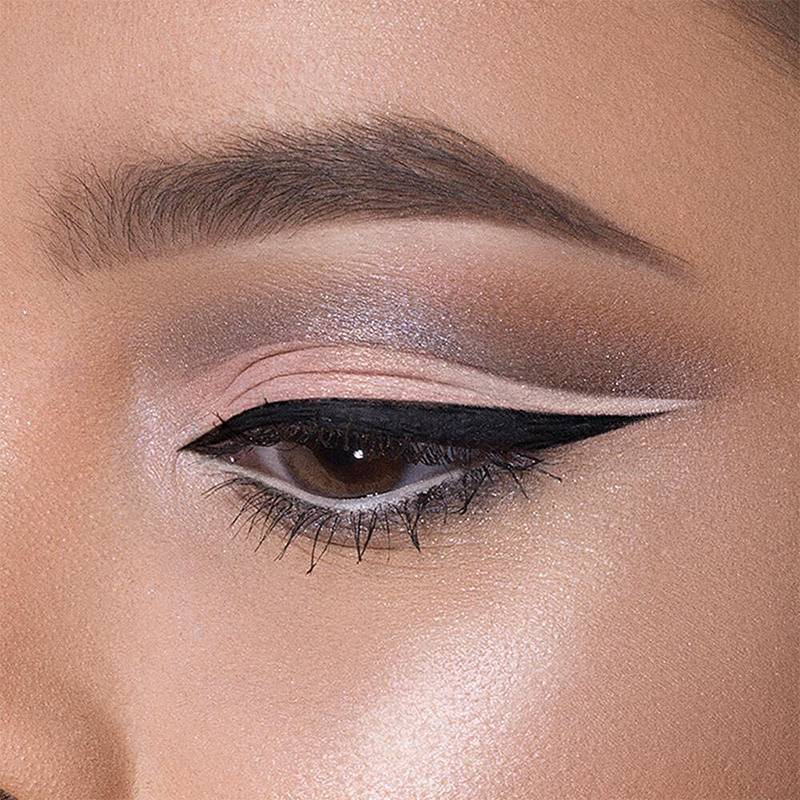
Winged eyeliner focuses mostly on lining only the upper lid, somewhat similar to a cat eye makeup. Achieving the perfect winged eyeliner look is your dream and this guide is going to outline for you ways to perfect it.
Must see: Things to Look Out Before Buying a Makeup Product
Here are some of the best makeup tips for creating the perfect winged eyeliner look:
Winged Eyeliner for Your Eye Shape
Before picking up your liner, it helps to know how your specific eye shape changes the technique:
- Hooded eyes: Draw the wing slightly higher and thicker than you think you need to, since hooded lids can hide a thin wing when eyes are open. Keep the line as close to the lash line as possible on the inner and mid-lid.
- Downturned eyes: Angle the wing upward more aggressively toward the end of your eyebrow rather than following the natural downward slope of the eye, this lifts the whole eye visually.
- Almond eyes: The most flexible shape for winged liner, a classic 45-degree angle wing extending from the lower lash line works well here.
- Monolid eyes: A thicker, more graphic wing tends to show up better than a thin line, since there’s no crease to interrupt the visual line.
- Round eyes: Extend the wing further out horizontally rather than upward, this elongates the eye shape rather than emphasizing its roundness.
Use tape
To start, you can use a piece of the household tape just below where you will draw the eyeliner wing. You will use the tape as a tracking line and then draw on the wing. You can then remove the tape to get a perfect clear winged eyeliner look.
Keep your elbows firm
In order for you to get the best eyeliner, always ensure that you have your elbows supported on a table. This makes it stable as you apply winged eyeliner so that you leave no room for any errors that might ruin your perfect eyeliner draw.
Clean up the lines
You have finished drawing either your white eyeliner or the permanent eyeliner. To finish off well, dip an angled brush or even the Q-tip in makeup removing solution and then clean up any of those imperfect lines that are undesirable.

Step smokey eyes
For you to get quick smokey eyes it will be best for you to use a gel eyeliner pencil to line your eyes. Do this with keenness to achieve the perfect line and then gently blend the eyeliner for that smokey winged eyeliner result. This also comes with the advantage of providing a base for your eye shadow and guaranteeing long lasting shadow.
Practice always makes perfect
If you are a novice in making eyeliners, it is best to start with a pen version. This lets you get a feel of the fluidity of the eyeliner pen. You can practice drawing eyeliner on the back of your hand before you move to applying the winged eyeliner. This allows you to make mistakes and then correct them so that you get perfect over time. Always use small strokes along the lush line until you are able to perfect a good fluid line. Always Make sure your know how to apply foundation correctly in your makeup as it makes the base of your eye makeup.
Choosing the Right Eyeliner Formula
Not all eyeliner formulas are created equal, and picking the right one makes the whole process easier:
- Liquid eyeliner: Gives the crispest, most precise line and the most vivid color payoff, but has the steepest learning curve for beginners since it dries fast and doesn’t forgive shaky hands. Shop my go-to liquid eyeliner (paid link).
- Gel eyeliner pencil: The best middle ground for most beginners, easier to control than liquid, but still gives a defined, long-lasting line. Great for the smokey wing technique mentioned above.
- Pen/felt-tip eyeliner: The easiest starting point if you’re brand new to winged liner, the flexible tip mimics a marker and is far more forgiving than liquid.
You have now perfected your technique of eyeliner application. The next thing you want to do is get the right tools that will help you to achieve the winged permanent eyeliner look. Talk to a beauty stylist to give you some advice about the best tools for makeup that you can use.
Frequently Asked Questions
What’s the easiest eyeliner type for beginners?
A pen or felt-tip eyeliner is generally easiest to start with, since it handles more like a marker than a paint. Gel pencils are a good second step once you’re comfortable.
How do I fix a winged eyeliner mistake without redoing my whole eye?
Dip a clean angled brush or a cotton swab in makeup remover and carefully clean up just the uneven part, rather than wiping off the entire line and starting over.
Why does my winged eyeliner look different on each eye?
This is extremely common since your two eyes likely aren’t perfectly symmetrical to begin with. Focus on getting both wings to look balanced from a normal viewing distance rather than chasing exact mirror symmetry.
How long does winged eyeliner typically last through the day?
A good liquid or gel formula should last 8-10 hours without significant fading or smudging. Setting it with a light dusting of translucent powder over the line can help it last even longer.
Should the wing angle match my eyebrow?
Generally yes, extending the wing roughly toward the end of your eyebrow creates the most natural-looking lift, though downturned eyes benefit from angling even higher than the brow line.






This is such a great post. I love the advice because it can be tricky to get the eye liner just right. https://www.bauchlefashion.com/2023/02/our-fresh-take-on-boucle-parisian.html