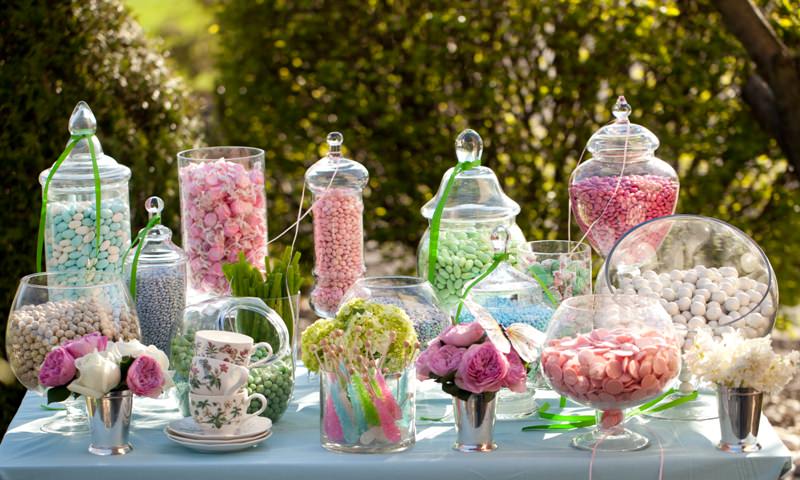
If you have been to a party, wedding, baby shower, or social event lately, chances are you have seen a candy buffet. Candy buffets are the most popular and creative way to treat guests. They take the place of traditional pastry tables and they carry a huge wow factor punch.
Candy Buffets are more than throwing some treats on a table. They take a little effort and some basic knowledge. Use these tips to create a fantastic candy buffet that you will be proud of and that no one will forget.
Supplies
- Table 6’ or 8’ long
- Table covering
- 8 candy dishes in various shapes and heights (clear)
- Scoops or tongs that fit in the jar openings easily
- Centerpiece
- Backdrop (optional)
- Candy
- Goodie bags or boxes for take-home treats
Getting started
The first thing you must do is create a budget. Uncontrolled spending can make your candy buffet more costly than you can imagine. Know how much you plan to spend and make your selections on items that give you the most bang for your buck.
You will need to select your colors. Base the colors on the theme you are creating the table for. A baby shower can be pastels, traditional pink and blue, or even primary colors. A school event is a big hit when you use the school colors. Seasonal colors are always good as they are easy to find. Orange, yellow, and brown for fall. Red, green, blue, and white for winter holidays. While you will choose two main colors, your candy and decorations can be various hues of the same color.
Gathering supplies
Get creative with your supplies. You can borrow containers from friends, or pick them up at garage sales or thrift stores. The table is set up with the back containers being tall , middle section is shorter, and front section is for very short jars or trays. You will place 3-4 tall jars on the back row, four for the center row (2 on either side of the centerpiece) and 2-4 trays or small jars on the front row.
You will purchase your candy in bulk. You will save money and have a much better selection from a bulk supplier like Sweet Services. You will need about 8 ounces of candy for each guest. Your candy can be layered in the clear jars or placed in their own containers and refilled as necessary. Suckers, rock candy sticks, straws, and lollipops are good for the back jars. The middle section is for chocolate balls, gum, M&M’s, gummies, mints, or other candy you can scoop. Use the front containers for individually wrapped candies, and candy that is “one per guest”.
You can use almost anything as a centerpiece. Use a flower arrangement, laced with candy. A back-to-school theme can be apple’s, pom-poms, pencil tins, or anything that has the school themes. The dollar store is a great place to find items to make a centerpiece.
Use a tablecloth of your choice. A solid color then covered with a different cloth positioned in a way that looks like a V hanging from the front of the table is always cool. Use the same colors to hang behind the table for a backdrop. Attach twinkle lights, cutouts, balloons, or wording on the backdrop.
Gift bags or small candy boxes are placed at the front of the table. Remember, the larger the container the more people will take. You might want to buy a few that are smaller to use if the candy starts to run low.
You now have the makings for a great candy buffet. Stage your table and watch your guests as they are wowed!
Image credit: weddingdash


my goodness, this looks like such a fun idea! x
mia // https://beautiful-inspiring-creative-life.com/